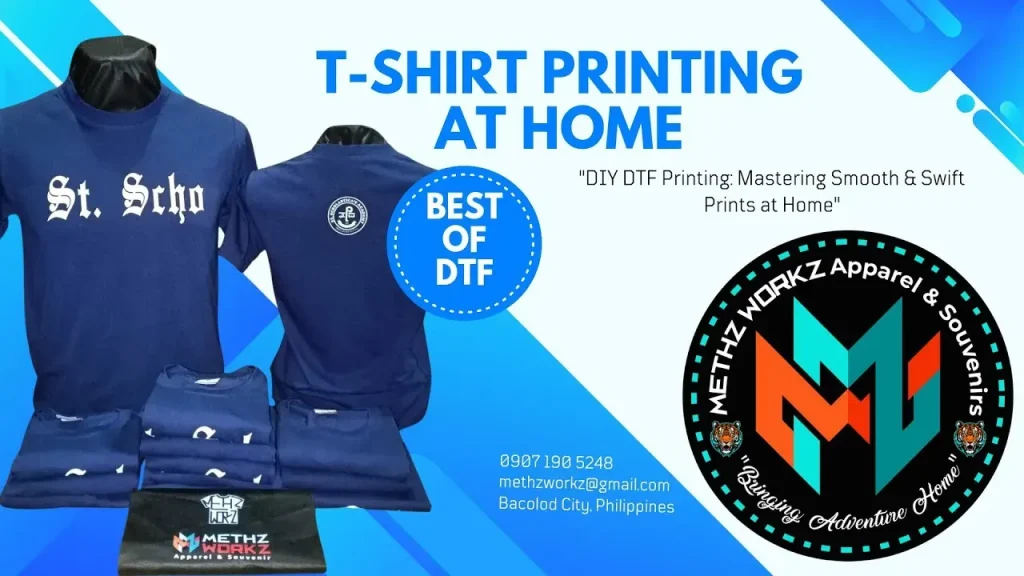
DIY DTF printing is an innovative method that has made fabric personalization more accessible and exciting than ever. As a method that combines vibrant colors with durability, DTF printing is favored by both DIY enthusiasts and small businesses aiming to create custom fabric designs. In our comprehensive DTF printing guide, you will learn essential techniques and tips on how to DTF print effectively, including the must-have DTF printing equipment for beginners. With DIY printing tips and tricks, you can transform your creative ideas into reality while ensuring that your prints are both stunning and long-lasting. Whether you are looking to revamp your wardrobe or start a custom apparel business, DIY DTF printing offers limitless possibilities for your creative expression.
The art of direct-to-film printing has emerged as a transformative technique in the world of fabric customization. This process not only allows you to imprint intricate and luminous designs onto materials but also enhances the durability of the prints, ensuring they withstand everyday wear. If you’re diving into the realm of creating custom textile graphics, understanding the essentials of this printing practice is crucial. Discovering alternative terms for DTF printing, such as film transfer technology or fabric printing solutions, might expand your knowledge base and open doors to innovative applications. By familiarizing yourself with this printing method, you’ll unlock the potential to craft unique clothing items that reflect your personal style or brand.
Understanding the Basics of DTF Printing
DTF printing, or Direct-to-Film printing, is a revolutionary technique designed for vibrant and durable fabric prints. This method works by printing images onto a special transfer film, which can be easily adhered to various fabrics using a heat press. One of the standout features of DTF printing is its versatility; it allows for complex designs including gradients and intricate color combinations that other printing methods struggle to achieve. With DTF printing, both beginners and seasoned designers can enjoy a user-friendly approach to custom apparel production.
For those new to DTF printing, understanding the basic principles can significantly enhance your experience and outcomes. The process emphasizes the importance of quality materials — using specially formulated DTF inks and transfer films is crucial for achieving the best vibrant results. Many users appreciate how this method allows for creative freedom, making it easier to bring personal or business ideas to life in the form of stunning custom fabric designs.
Essential Equipment You Need for DIY DTF Printing
Before embarking on your DIY DTF printing journey, it’s vital to gather the right equipment to ensure success. The centerpiece of your setup will be the DTF printer. Brands like Epson and Brother are recognized for their superior DTF printing capabilities. Investing in a reliable heat press is equally crucial, as it plays a significant role in the quality of the final printed fabric. Using a press that evenly distributes heat and maintains consistent pressure will lead to better adhesion of your designs.
Additionally, the quality of your DTF inks and transfer film greatly impacts the vibrancy and durability of your printed designs. Look for high-quality DTF inks specifically optimized for your printer and choose transfer films that offer compatibility and clarity. Tools like design software are also essential for preparing sleek and professional-looking designs before printing. By ensuring you have all necessary equipment ready, you set a strong foundation for your DTF printing endeavors.
Step-by-Step Guide to Preparing Your DTF Designs
Preparing your design is a critical first step in the DIY DTF printing process. To get started, choose a design that resonates with your project, and make sure it fits well within the printable area of your transfer film. Utilizing design software such as Adobe Illustrator or CorelDRAW helps in editing and refining your designs. Also, it’s essential to adjust the color settings to the CMYK mode, which aligns with DTF printing standards, ensuring color accuracy in your prints.
One of the most critical tips in preparing your design is to always reverse the image before printing. Flipping your design horizontally guarantees that the orientation will be correct when transferred onto the fabric. This attention to detail can help prevent mishaps and wasted materials, making your journey into DTF printing smoother and more efficient as you create unique custom fabric designs.
Printing Your Design: Best Practices and Tips
Once your design is prepped, the next step is printing it on the DTF film. Load the transfer film into your printer and select the appropriate settings for DTF printing. Each printer will have specific guidelines on how to achieve the best outcome, so it’s important to refer to the manufacturer’s instructions. When printing, monitor the process to ensure that the output is as expected. Any inconsistencies or defects could lead to failed transfers later on.
An important tip during this stage is to inspect the printed film closely after the printing process. Ensure the printed film boasts a clear and vibrant output; any errors here will reflect during the transfer to the fabric. If required, make adjustments in your settings or improve your design before embarking on the actual fabric printing, minimizing the risk of materials going to waste in your DIY DTF printing projects.
The Application Process: Heat Pressing Your Design
Applying your printed design onto the fabric is where the magic happens. Start by preheating your heat press to the recommended temperature, typically around 320°F (160°C), which varies depending on the type of fabric you’re using. Position the printed film onto the fabric, ensuring the ink side faces down, directly in contact with the fabric. It is essential that the alignment is precise to avoid design discrepancies.
Once set in place, close the heat press and apply consistent pressure for the specified time, which usually lasts 15-20 seconds. This part of the process is crucial—sufficient heat and pressure will ensure that your design adheres well to the fabric. After pressing, peel the film away carefully; if done correctly, the vibrant printed design will now be a permanent feature of your fabric, showcasing your effort in DIY DTF printing.
Troubleshooting Common DTF Printing Issues
As with any DIY project, challenges may arise during your DTF printing journey. Common issues include poor color quality, incomplete transfers, or adhesive problems. Many times, these complications can be traced back to equipment settings or the quality of materials being used. Ensuring that your printer settings are optimized specifically for DTF printing can prevent these issues from occurring.
Another common concern is related to the maintenance of your DTF printer. Regularly cleaning the printer heads can avoid clogs that disrupt the quality of your prints. Staying informed through online communities, forums, and social media groups dedicated to DTF printing can provide helpful tips and solutions as well. By gathering insights from experienced users, you can troubleshoot effectively and refine your DIY DTF printing techniques.
Frequently Asked Questions
What equipment do I need for DIY DTF printing?
To start DIY DTF printing, you’ll need a DTF printer (brands like Epson are recommended), high-quality DTF inks, transfer film compatible with your printer, a reliable heat press, and design software such as Adobe Illustrator. These elements are essential to produce vibrant custom fabric designs.
How do I prepare my design for DTF printing?
When preparing your design for DIY DTF printing, choose or create your artwork using design software. Make sure to adjust the color settings to CMYK mode, reverse the image horizontally for correct alignment, and ensure it fits within the printable area of your DTF film.
What is the process for printing on DTF film?
To print on DTF film, load the transfer film into your DTF printer and use the appropriate print settings. After printing, inspect the film for quality to ensure your design is clear and vibrant, which is crucial for successful transfers to fabric.
How do I apply adhesive in my DIY DTF printing project?
After printing your design on the DTF film, sprinkle a layer of DTF powder adhesive over the wet ink immediately. Use a heat gun or heat press to melt the adhesive, ensuring it fully bonds with the printed image for optimal adhesion during the transfer process.
What are the steps involved in heat pressing DTF prints onto fabric?
To heat press your DTF prints, first preheat your heat press to about 320°F (160°C). Position the printed film onto the fabric with the design facing down. Close the heat press and apply pressure for 15-20 seconds. Once done, peel the film carefully to reveal your printed design.
What tips can help ensure success in DIY DTF printing?
For successful DIY DTF printing, practice on fabric scraps before starting large projects, use high-quality materials for the best results, maintain your printer by cleaning the heads regularly, and engage with online DTF printing communities for insights and tips.
| Key Points | Details |
|---|---|
| What is DTF Printing? | A process for printing high-quality images onto a special film, which can be transferred onto fabrics using a heat press. |
| Essential Equipment | 1. DTF Printer (e.g., Epson, Brother) 2. High-quality DTF Inks 3. Compatible Transfer Film 4. Reliable Heat Press 5. Design Software (e.g., Adobe Illustrator, CorelDRAW) |
| Steps for DIY DTF Printing | 1. Prepare your design (Choose, adjust settings, reverse image) 2. Print the design on DTF film 3. Apply powder adhesive to the wet ink 4. Use heat press to transfer to fabric 5. Cure the print with additional heat |
| General Tips | – Experiment on fabric scraps – Invest in quality materials – Maintain printer regularly – Engage with online communities for tips |
Summary
DIY DTF Printing offers a creative and exciting way to design personalized apparel. By following the outlined steps and understanding essential techniques, anyone can embark on this journey to produce vibrant, high-quality fabric designs. With the right equipment and a passion for creativity, DIY DTF printing can transform your fabric projects into unique statements. Whether for personal use or small business ventures, mastering this craft opens up endless possibilities for customization.